Basic laboratory Practices
Working with solutions
Measuring liquids
Volume
1 L (liter) = 1000 ml (milliliter)
1 ml = 1000 µl = 1 cc (cubic centimeter)
You will use several tools to measure liquid throughout the semester. They generally differ in the volume that they are used to measure and in their accuracy. The most commonly used items are described below:
Micropipettes

These instruments are used to measure relatively small amounts of liquid, generally equal to or less than 1 ml (1000 µl). Each lab group has at least 4 micropipettes: a P2 (measures 0.2-2 µl), P20 (measures 2-20 µl), P200 (measures 20-200 µl) and a P1000 (measures 200-1000 µl). The P20 and P200s use the same ‘universal’ yellow or clear tips, however on those occasions when filter-barrier tips are used, each pipette fits only a specific set of tips. These will be clearly labeled. The P1000 uses the larger blue tips, and the P2 uses smaller clear or yellow tips. (NOTE: please be careful to match the pipette you are using with the proper tip!)
How to use a pipetman
You will notice two points of resistance in each pipetman as you depress the plunger, referred to as ‘stops’. To measure accurately with a pipetman it is important that the plunger is pressed down only to the first point of resistance when drawing up the liquid. Then, when dispensing the liquid, the plunger is pressed down as far as possible (through the ‘second stop’).
If you are adding liquid to a tube that already contains liquid, be sure that the two liquids are adequately mixed together by pipetting up and down a few times, vortexing the tube, or inverting the tube.
Serological pipettes: These plastic tools are used to measure liquid in the range of 1 ml – 25 ml. There are 4 sizes of pipettes available in the lab: 1
ml (yellow), 5 ml (blue) 10 ml (red) and 25 ml (purple), although in practice we usually use the p1000 micropipettes for 1 ml. The liquid is drawn up into the pipettes using the battery operated pipette aids that are at your stations. Press the “S” (upper button) to suck up liquid and the “E” (lower button) to empty the pipette.
You’ll notice that a P1000 and a 1 ml pipette can measure accurately within the same range. The choice of instrument will depend upon what’s handy and whether the vessel you’re putting the liquid into requires a longer, narrower tip. Another consideration is cost: it is significantly cheaper to use a P1000 with a pipette tip than a sterile 1 ml pipette.
Graduated cylinders (below): These are useful in accurate liquid measuring when preparing buffers and solutions. Graduated cylinders are available that measure up to 50 ml, 100 ml, 250 ml, 500 ml, 1000 ml or 2000 ml (2L).
Beakers (below left) and Erlenmeyer flasks (below right) are less
accurate than graduated cylinders, but work fine if you’re just eyeballing the volume.
Calculating Molarity and Percent Solutions
Molecular Weight
The molecular weight (M.W. or formula weight, F.W.) of a chemical is calculated by adding up the weights of the individual elements. The mw of a chemical is written on the front or side of the container. This is the amount of a chemical (in grams) that constitutes one mole of that specific chemical (Avogadro’s number of molecules). You can calculate the mw of a chemical if you know its formula. For example: the mw of NaCl is 58.44 (22.99 g/mole of Na plus 35.453 g/mole of Cl). So, 58.44 g of NaCl is equivalent to 1 mole of NaCl.
Molarity
A 1M (molar) solution is 1 mole of a chemical in a Final volume of 1L (liter). From the example above, 58.44 g of NaCl in 1L of water is a 1 Molar solution of NaCl. To prepare 1L of a 1M solution, the chemical is typically dissolved in about 800 ml of deionized water (0.8L). Once dissolved, and the pH adjusted (if necessary), the final volume is adjusted to 1L. This is done to account for the volume that is contributed by the dissolved chemical itself, and any added acid or base.
Formula to calculate the amount of chemical required for a solution of a given molarity and given volume:
MW (g/mole) X mole/L (desired final molarity)= g/L. Multiply this by the final desired volume (in L) = grams/solution.
Percent solutions
The concentrations of some solutions are expressed as a percent (w/v or v/v), as opposed to molarity. When calculating a percent solution, the molecular weight of the chemical is not a factor.
(w/v): weight/volume
By definition, a 1% solution (w/v) of a solid crystalline or powdered substance is equal to 1 g per 100 ml of solution; for example, a 1% sucrose solution is 1 g of sucrose per 100 ml of dH2O or buffer; a 5% solution of BSA (bovine serum albumin) is 5 g of BSA per 100 ml of dH2O or buffer; a 0.3 % solution of NaCl is 0.3 g of NaCl per 100 ml of dH2O or buffer, etc.
The most accurate way to make up these kinds of solutions is to first fully
dissolve the appropriate amount of substance (eg, NaCl) into a volume of liquid somewhat less than is required, then to bring it up to the desired final volume while measuring in a graduated cylinder. This ensures that your final volume will not be too high, in case the dissolved substance takes up any substantial volume. However, if the percentage of solid substance is relatively low (1% or less) and/or if absolute accuracy is not critical, it is acceptable to directly add the weighed chemical to the measured final volume of liquid.
(v/v): volume/volume
In contrast to percent (w/v), a percent (v/v) solution refers to two liquids: by definition, a 1% (v/v) solution of a given liquid (usually a concentrate) equals 1 ml of that liquid per 100 ml total volume of dH2O or buffer. For example, a 1% solution of Tween-20 (a viscous, liquid detergent) is 1 ml of Tween-20 per 100 ml (total) buffer. (i.e., 1 ml of Tween-20 plus 99 ml buffer). A solution of 5% DMSO in cell culture media is 5 ml of DMSO per 100 ml total of culture media, i.e. 5 ml of DMSO plus 95 ml culture media. A solution of 0.2% of NP-40 (another detergent) in buffer is 0.2 ml of NP-40 plus 99.8 ml buffer (although when the percentages fall below 0.5%, you can typically just add the required amount of “concentrate” to the full final volume- 100 ml in this case- of dH20 or buffer).
Stock solutions
For convenience, this lab (as every lab) has several concentrated
‘stock’ solutions that are to be diluted at the time of their use, typically with water or another buffer (think of frozen concentrated OJ or Campbell’s soup). The working concentration of a solution (i.e., what we use in our experiments) is almost always “1X” relative to the
concentrate, so pay attention to labels that indicate, for example, “5X”
or “10X” lab solutions. This simply means that each component of the solution is 5-fold or 10-fold, respectively, more concentrated than the
1X working concentration. These ‘concentrates’ are to be diluted just before use to achieve their final “1X” concentration. For example, a
5X solution would need to be diluted by a factor of 5 (1:5), whereas a
20X solution would need to be diluted by a factor of 20 (1:20), and so on.
Some ‘stock solutions’ contain only a single ingredient, for example Tris-Cl buffers (e.g. 100 mM) or SDS detergent solutions (e.g. 10%), and for these, there is not necessarily a single standard “1X” concentration for their use at the bench. Accordingly, these stock solutions are simply diluted as needed by the particular application, once the dilution factor is calculated.
Understanding dilutions
When working in a lab, you will frequently be asked to make dilutions from a stock concentrate, as indicated above; it is essential that you are totally comfortable with how to make dilutions.
By definition, a 1:10 dilution of a stock concentrate means that there are 10 equal parts (volumes) of the final solution, one part of which is the concentrate and 9 parts of which are the diluent (dH2O or buffer). Similarly, a 1:3 dilution means that there are 3 equal parts (volumes) of the final solution: one part concentrate plus two parts of diluent (dH2O or buffer). Importantly, as this is subject to confusion: a 1:2 dilution means one part concentrate plus one part diluent, for two parts total. Do not make the common mistake of referring to this as a 1:1 dilution! You have a 1:1 RATIO of parts, but that is not the same thing as a 1:1 dilution.
The following formula is helpful in calculating dilutions: C1V1 = C2V2
where C1 is the concentration of the stock solution, V1 (usually the
‘unknown’) is the amount (volume) of the stock necessary to make the
correct concentration of the working solution, C2 is the final concentration of the working solution and V2 is the final desired volume of the working solution.
For example, if we have a 1 M stock solution of Tris buffer, and we need 20 mM final concentration in 10 ml of lysis buffer: how much Tris stock and how much buffer is needed? (answer below)
Answer: add 0.2 ml or 200 µl of concentrated stock (1M Tris) into 9.8 ml buffer. (This is a 1:50 dilution of the 1M Tris).
Additional Resource:
http://www.wellesley.edu/Biology/Concepts/Html/dilutions.html
Weighing chemicals
1 g (gram) = 1000 mg (milligram)
1 mg = 1000 µg (microgram)
1 µg = 1000 ng (nanogram) = 0.001 mg
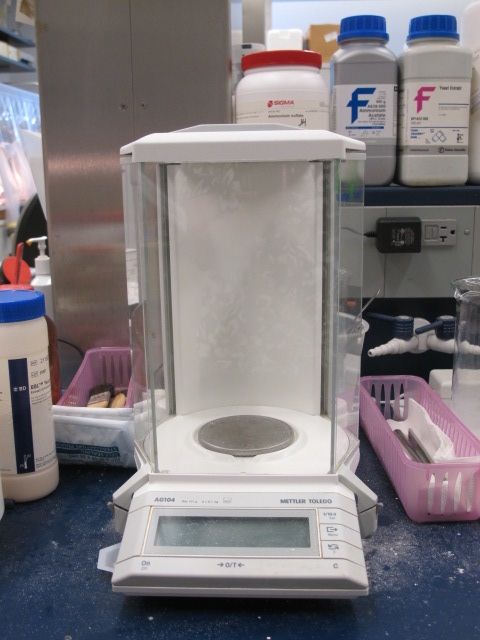
Use the appropriate digital balance to weigh out chemicals. The enclosed Mettler balance (below) is more sensitive and is used to measure smaller amounts of chemical (~1 mg-1 g or more). The dust shield protects the chemical against wind currents, which could result in loss of chemical and/or inhalation by the user.
Laboratory Equipment for weighing dry chemicals:
Mettler balance
The Denver Instrument open pan balances work well when measuring between 1-200 grams.
Use weighing paper or a weigh boat to contain the chemical. Tare (blank) the machine with the weighing vessel on it, add the chemical and adjust to the appropriate amount. If you take out too much, discard it rather than returning it to the bottle to avoid contamination.
Always clean up after yourself. Most times, spatulas can be wiped clean with a kimwipe or rinsed with DI water followed by wiping.
Measuring and adjusting the pH of a solution
Many enzymes are effective only within a specific pH range, and must be prepared in buffered solutions that prevent wide shifts in pH as the reaction progresses. Buffers are adjusted to the correct pH during their preparation using a pH meter (below).
Just prior to use, it is important to calibrate the machine by running pH standards; these typically consist of commercially prepared buffers of pH 7.0 and pH 4.0 (occasionally a pH 10.0 buffer is also used for calibration). The calibration procedure for each brand of pH meter varies somewhat, and it is best to allow an instructor or TA to assist you when using a pH meter for the first time. However, the following instructions can be used as a general guide:
While in ‘calibration mode’, remove the electrode from the storage buffer solution, rinse it with dH2O by using a squeeze bottle and capturing the run off in a beaker, and place it sequentially in each of the pH buffer solutions, making sure that the electrode is thoroughly rinsed in between each solution. Never wipe an electrode. This can cause erroneous readings due to static charge. Once the machine is calibrated, place the electrode in the solution you are preparing. Adjust the pH up with base if the pH is too low (usually dilute NaOH) and down with acid if the pH is too high (usually dilute HCL). Always rinse the electrode and place in the storage buffer when finished (or the standard pH 4 buffer). Never store the pH electrode in dH2O.
